
The Making Of monotrino, Part 10
Back after more than 2 months… but at least, with good news!
I actually did quite a few things during the last weeks. In order:
- I tested the DAC circuit and the monotron connection using my Ode An Die Freude sketch; worked like a charm.
- I tested the LCD with the standard hello world sketch; worked like a charm.
- I connected the 7 “white keys” notes. Took me 2 hours (prepare 14 wires + Dupont connectors + soldering to buttons). And yes, it worked like a charm :-)
- I connected the jack plug + knob on the top right to the Arduino’s tone() output. It kinda worked, BUT with some quirks. More about it below.
- I connected the 5 knobs. This one was quite hard, and took me several hours and some head-scratching.
- Finally, yesterday I managed to wrap everything up and write some code to play the monotron using the buttons as a piano keyboard, including a very rudimentary, but effective, AR envelope. It worked like two charms! :-)
Also, in the mean time:
- I ordered (on 17th September) and received (on 15th October) a Tosduino Nano (8.50€ from Hong Kong, off ebay). I had to, because I discovered that my supposedly original Arduino Nano 3.0 is mounting an ATmega168p, instead of a 328p. This means 1k RAM instead of 2k, 16k flash ROM instead of 32k, but above all… 512 bytes EEPROM instead of 1k. You may think well, not a big deal. But I thought about it a lot and came to the conclusion that 512 bytes are NOT enough to save the 8 patterns of my sequencer. Incidentally, the Tosduino is also black, which looks damn good on my case :-)
- I ordered (last Friday) and received (today!!!) a sample packet from the good people at TI :-) Nothing groundbreaking, just a pair of LM331 Precision Voltage-to-Frequency Converter chips, which I plan to use as VCO in my forthcoming (for a very liberal definition of “forthcoming”) experiments in analog synthesis. Cool stuff, this whole sample enchilada. If you’re interested, you can read about it here or here.
But back to our beloved monotrino. They say good things come to those who wait, and you sure waited a lot. So, I’m going to reward you with the first picture ever of the little beast in action:
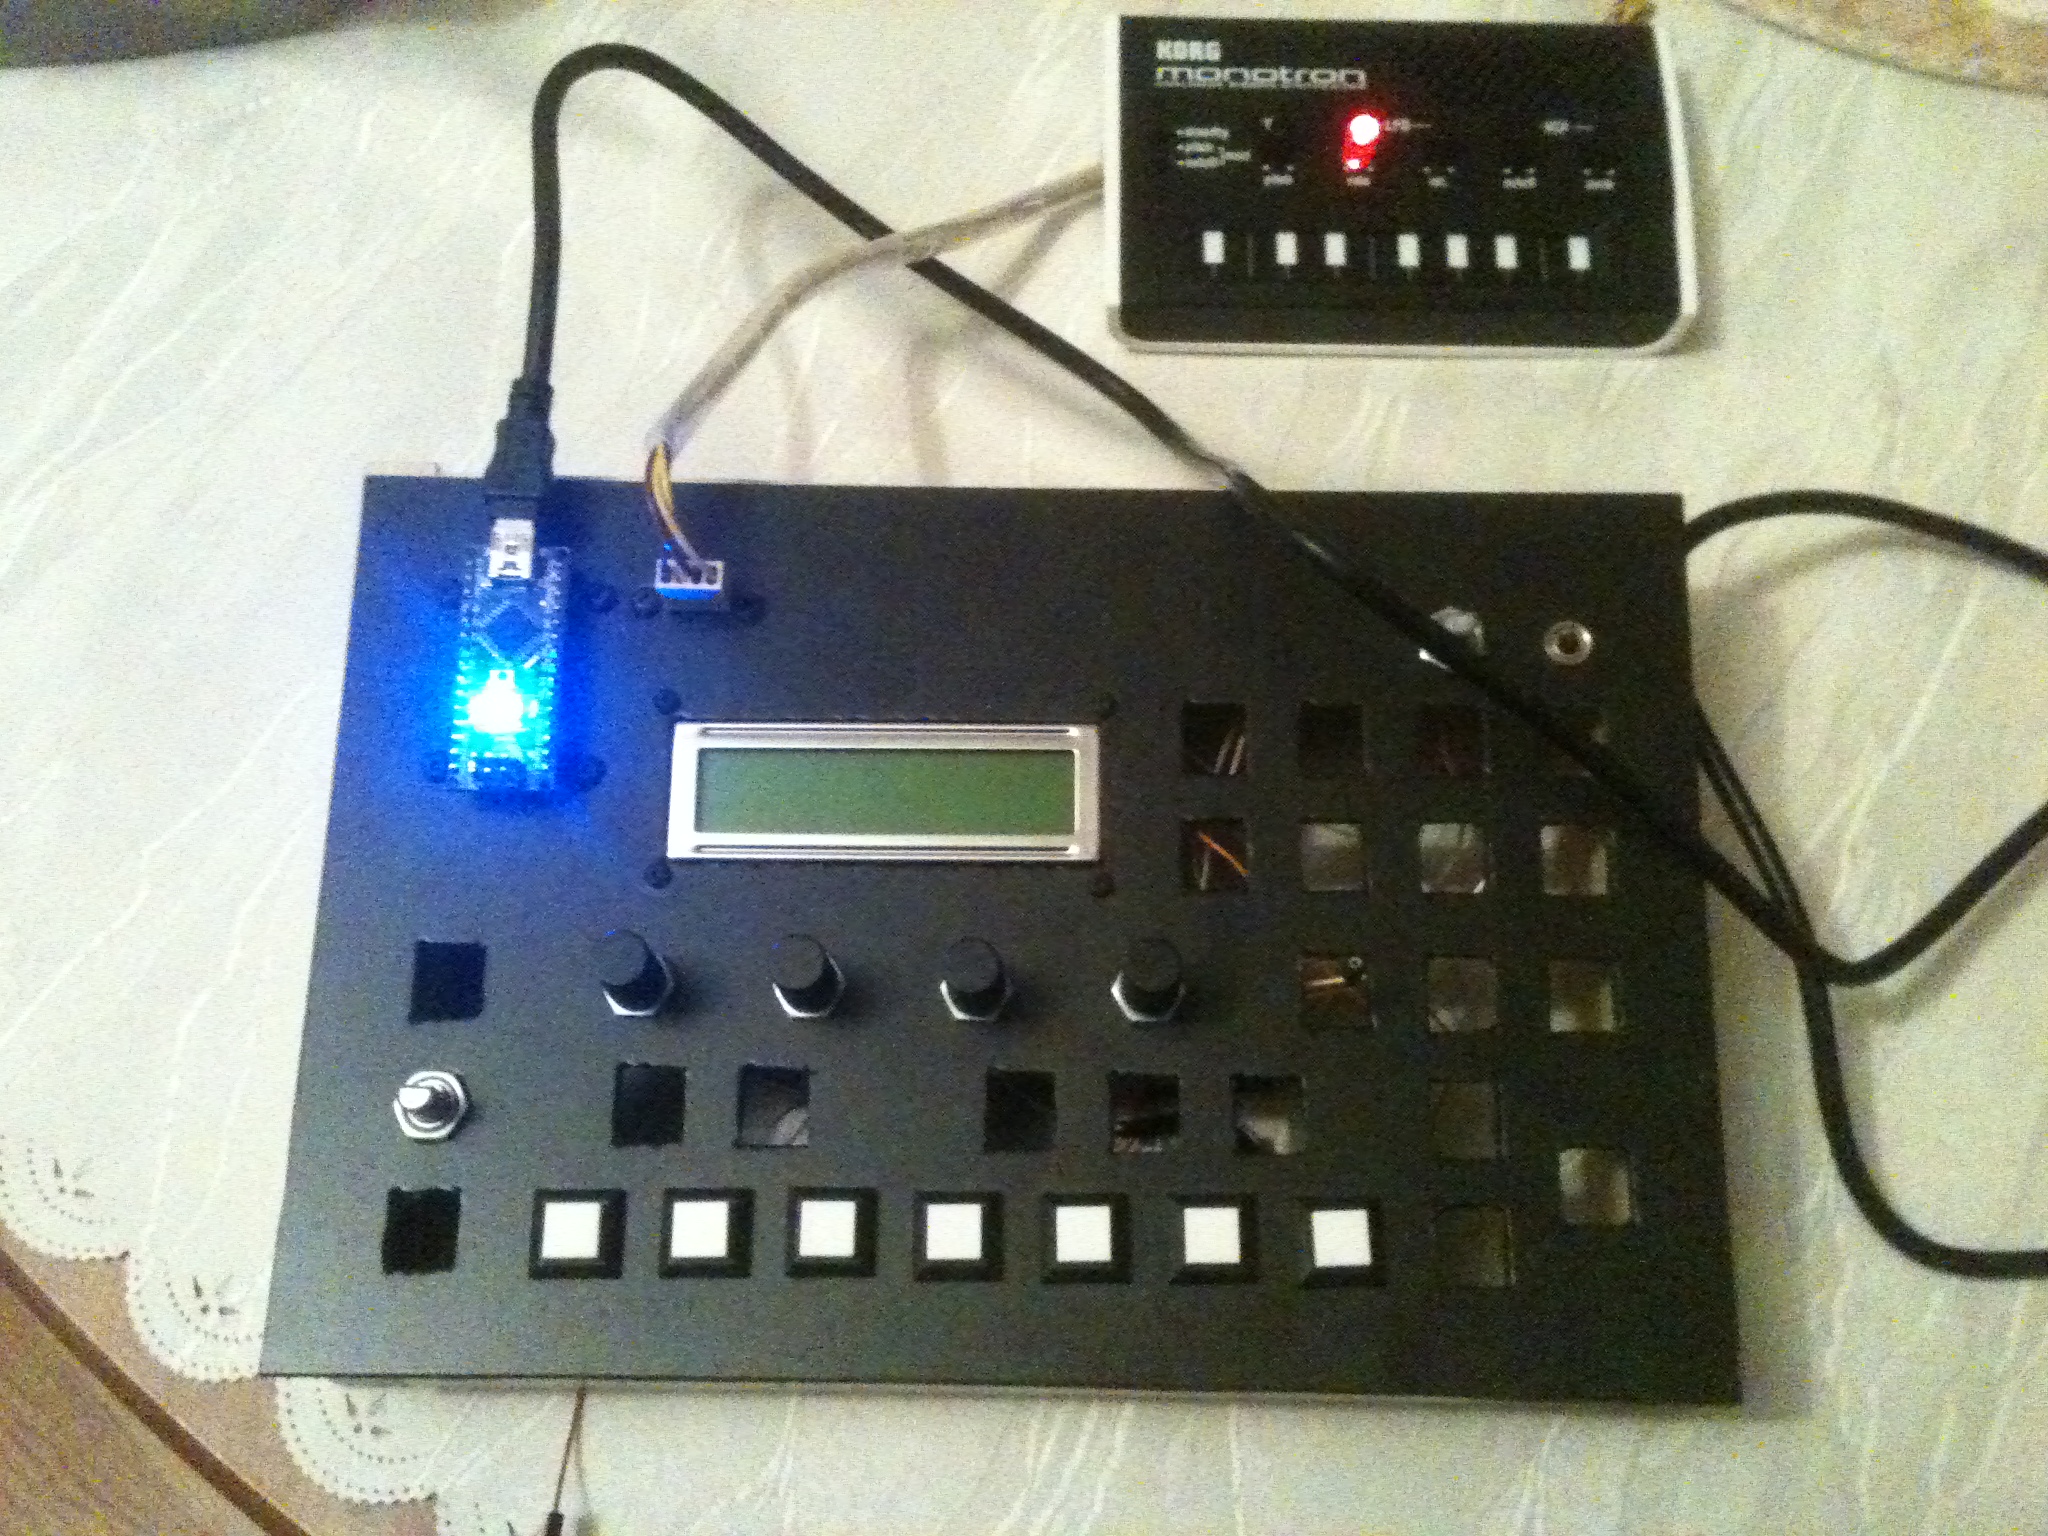
Be honest, just how cool does it look? :-)
And there are still lots of missing buttons, and I’m not even using the LCD yet.
To tone() or not to tone()
One of the things I wanted monotrino to do was to provide an additional oscillator for the monotron, using the builtin tone() and routing the output to the monotron audio in.
This, unfortunately, doesn’t work right out of the box. Looks like tone() interferes with the normal behaviour of other pins. Maybe the SPI bus (eg. the DAC), or more probably the gate pin.
The result is that you kinda hear the internal tone even without routing the audio… in form of a disturbance of the monotron sound. Not totally bad – in fact, more or less what I wanted to achieve. The only problem is that this disturbance (being probably a flickering of the gate) doesn’t seem to be filtered at all, resulting in a very chiptune-ish overall sound.
Anyway, I’m going to come back to this later and see if I find a solution. Not a priority for now.
O knob, knob, wherefore art thou knob?
As mentioned, knobs were quite an headache. Not per se, actually, it’s more… my stubborness. I decided that I want all components to be easily unmountable and reusable in a different case. This means basically that I don’t want to solder things together, but use connectors instead.
Problem is, my potentiometers (Alps RK09) are good for through hole mounting, but the pins are too short otherwise. I first tried with female header strips, but the grip was too weak. And the goddamn wire kept unsoldering from the strip! Then I tried with the Dupont, but still was much too weak. Just moving the box around caused half of the connections to drop.
In the end, I used only the bare crimp contacts, wrapped in electrical tape to avoid shorts between them. Still not optimal, but acceptable for now. When I’m done and everything is finalized, I will probably solder them a bit.
If music be the food of love…
The code I used is here:
As I said, it’s very minimal, almost brutal in his simplicity. Overall, I spent maybe 1 hour on the code. Setting up the note playing was trivial (I index the note to DAC voltage as note_to_pitch[12-b] because I wired the keys “backwards”, eg. B is 6 and C is 12).
The envelope was slightly less than trivial. I used to write some DSP code on the computer, and there is a big difference here. On a regular computer, you set the sample rate to, let’s say, 44.1kHz, and you know that there will be 44100 samples in a second. On the Arduino, you just don’t know how long the loop takes. And thus, how many times it will run per second. I think you could do something more using timers and/or interrupts, but for now I just wanted to use plain, newbie-friendly code.
So I resorted to write a time-based envelope. It calculates the increment per millisecond, then simply counts the milliseconds elapsed since the envelope started, and multiply it. This means the virtual sample rate is… 1kHz, best case. Much less if the loop lasts a few milliseconds. And considering printing to the LCD, and maybe doing serial I/O, this could very well be the case.
Pretty shitty if you compare it to a computer. But hey, still sounds good to me :-)
I also didn’t do much for the parameter tuning. The envelope just sweeps the cutoff from 0 to the knob value on attack, and from knob to 0 on release. In reality, the useful range for the cutoff is much less than the 0..4096 DAC range. But improvements will come later.
Even with all those limits and quirkness, it was already a ludicrous amount of fun playing with it. And the feeling that my bloody little toy starts to bear some resemblance with a musical instrument… well, priceless!
I wanted to add some audio, or even a video, to this post. But didn’t manage to make it yesterday, so just take my word for it. I hope to have something funny to put up during the next weekend.
cheers,
Aldo

 Fritzing
 narbotic
Comments are currently closed.