Day 0: Unboxing && Testing
Take this as a kind of a mini-tutorial (there are better ones for Arduino, not so many that I found for the MidiVox), but really it’s mostly here just for the sake of completeness. This was happening one week ago, when I received my kit.
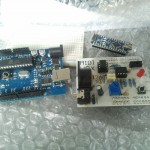
First things first, the unavoidable unboxing picture, in all the glorious crappiness of my mobile phone’s camera:
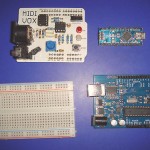
And a better quality picture, from the eBay auction I won:
I got the package delivered in the office, so I had of course no other hardware or electronics spare parts at hand. Not that I own many of them anyway… The first thing I must do, in fact, is go and buy some components somewhere. But that’s another story.
So, last Friday, at lunchtime, I was there with the Arduinos, the MidiVox, my work laptop and USB cables. And an irresistible urge to try them out :-)
I followed the instructions (I’m using Ubuntu 11.10 at work) and everything went very quick. Basically you just need to:
sudo apt-get install gcc-avr avr-libc
sudo usermod -aG dialout dada # dada is my username, use yours
Then download and unzip the Arduino IDE (it’s also packaged in Ubuntu, but I wanted the latest and greatest), and there you go. Plug the Arduino in a free USB port and run ./arduino. You have to tell the IDE which kind of board you are using (menu Tools » Board) and select the port (menu Tools » Serial Port; there should be only one, /dev/ttyACM0 or /dev/ttyUSB0, whatever).
You can already tell Arduino what to do. Just write the code in the IDE and press the button that says “Upload”. For a starter, I copypasted some very basic thing. First the BareMinimum example, just as a sanity check. Then of course Blink, which is pretty much the only thing you can do without additional hardware. It blinks the LED on board on and off. Change the 1000 in the example, and it blinks slower or faster. Wooooo! :-)
BTW, I realized only afterwards that all the examples from the Arduino website are already available in the IDE under menu File » Examples. Oh well.
After successfully testing both boards, I had to check that also the MidiVox was alive and kicking. That’s slightly trickier. First of all, it needs quite some software to run. As mentioned on the MidiVox page, I downloaded the Healer Synth v2 and unpacked it in ~/sketchbook. Then the Arduino MIDI library and unpacked it in the libraries folder of the Arduino IDE. At first, I didn’t know exactly what to do. It turns out you have to open MidiVox_Healer_v2.pde in the IDE (note it will be renamed to .ino afterwards, so that filename is only valid for the first time) and upload this. All the libraries and stuff are included automagically.
So far, so good. The problem is that, with the provided software, the MidiVox gets input from the MIDI port. And I had no instrument with a MIDI out port to connect to it. So I studied the code a bit, and modified the loop() function as follows:
// after the #include lines, add:
long previousMillis = 0;
long interval = 500;

void loop(){
    MIDI_Read();            // poll for MIDI data

    unsigned long currentMillis = millis();
    if(currentMillis - previousMillis > interval) {
        previousMillis = currentMillis;
        SynthController_ProcessEnvelopes();
        SynthController_Trigger(63, 0.5, 0.0, 0.0);
    } else {
        SynthController_ProcessEnvelopes();
        SynthController_Trigger(255, 0.0, 0.0, 0.0);
    }

    if ((PIND&B1000000)==0){
        saveAndReset();
    }
}
That is to say, send a note number 63 with cutoff at 0.5 every 500 milliseconds. I plugged the earphones in the MidiVox jack, and wow! I heard short, slightly metallic notes every 1/2 second in my ears (only one ear, actually, since the MidiVox only outputs mono).
I was truly impressed. I could have done more tests, changing parameters and such, but unfortunately work was calling :-(
That’s basically what I did so far. One week has passed since then, and I had no chance to discover more. But it’s going to be soon…
cheers,
Aldo


 Fritzing
 Makeblock
 narbotic
Comments are currently closed.