The Making Of monotrino, Part 1
Howdy people! Back from my holidays, and finally started actually building my sequencer :-)
I spent some time breadboarding the keyboard, to make sure that one analog pin can handle 12 buttons. And it does!
So, after some more days gathering the energy and will to start getting serious with the solder pen, yesterday I finally started laying out and connecting the dotscomponents.
And man, that’s an unholy mess! I really understand now why PCB were invented :-)
After some initial struggling to solder the wires, I came up with a working technique:
- Measure the length between the points to be connected (allow some more to let the cable “float” a bit).
- Cut and strip the wire.
- Put tin on the two wire’s ends. Not just some tin, the copper must be totally inside a great ball of tin.
- Solder the points on the perfboard, even if only the wire is to be connected. Here also don’t spare on tin, use a lot of it.
- Put a wire’s end on the perfboard and touch it with the solder pen so that both tin balls melt with each other.
Not sure it makes a lot of sense, easier to do it than to explain it :-) But I hope it helps, anyhow.
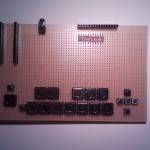
Here a couple of photos where you can admire the result of my hard work. This is the front panel, with all buttons in place and also the headers for the Arduino and the LCD soldered:
And this is the flip side:
I spent ~2 hours for this, and this is only to connect the resistors between buttons! I still have to connect the upper pins of the buttons to a common strip, and then to the analog pin. Oh well, I guess this project will keep me busy for another six months or so :-)
Stay tuned for the next “making of” installment, hopefully soon!
cheers,
Aldo
And Now We’re Up To Something The Making Of monotrino, Part 2


 Fritzing
 Makeblock
 narbotic
Comments are currently closed.