Klaatu Barada Nikto!
The most geeks among you will surely have guessed the subject of this post: ROBOTS!
Yep, I’m taking a break from my usual musical stuff to talk about a new toy we (me and my 13 year old son) received for Christmas… because we’ve been so good!
Actually, it went like this: we were randomly browsing around in a toy shop, when my son’s attention is captured by a triumphant LEGO Mindstorms box. I try to minimize, but in vain. A few weeks later, when asked “what would you like for Christmas?” he had no doubt. The Mindstorms, of course.
Twas a hard blow. I mean, I would be as happy to get my hands on a Mindstorms as he would, but… that pricetag! :-(
And not only that: while the LEGO system itself is remarkably open in what you can build (by openness here I mean: freedom of exploration, creativity, space for invention, you name it), the Mindstorms is quite a closed system. Which means, if you want to add sensors, motors and so on, you have to buy the horribly expensive LEGO parts. I know that technically is possible to interface external electronics with Mindstorms, but you have to add laziness to the equation. If a ready-made, easy-to-use, good-looking piece is available from the shop, the motivation to go out of your way to hack something together decreases considerably :-)
In other words, it’s a road I didn’t want to go down.
So I started searching for alternatives. Initially, I considered a Robotic Arm Kit, but while cool in itself – and potentially hackable, it’s not quite in the same awesomeness field. And the reviews of the cheaper models weren’t exactly encouraging. After days of hunting, I was really soooo close to give up. Everything was either too expensive, or required way too much soldering skills, or was too limited.
And then… by chance (or with Santa’s help, who knows), while I was reading the MAKE feed as usual, I FOUND IT! There was en passant a mention of Makeblock, a name which did ring some bells. I started browsing around and was very pleased to learn about their Starter Robot Kit. Lego-like construction, easy, solderless, integrated 100% compatible Arduino, IR+remote and ultrasonic sensor, 2 models to start with. Plus, you can connect it with LEGO bricks with relative ease. Plus, available in store from a local Austrian reseller. WOOT!
Of course, I didn’t even try to resist the temptation of hitting the “BUY” button. Had there been a “SHUT UP AND TAKE MY MONEY” button, I would have clicked it as well.
Then things got delayed quite a bit, for the usual Christmas family duties, then work and school beginning again, etc. Only last Sunday we actually found the time to sit together (me and my son) and build our first robot.
We started with the simplest one, the Makeblock 2WD robot. Everything went very smooth and fast, we appreciated the smart Makeblock engineering and the instructions were clear. There were some minor issues here and there, but nothing serious:
- there is no riveting on the aluminium beams where the screws go in, so they have to “carve” their way in the metal; this means they don’t look good as new after use (no big deal) and may get loose after many screw-unscrew cycles (my guess)
- the plastic rivets require quite some force to pop in, and still sometimes pop out by themselves
- the Faston connectors which connect the motors to the wires are not really stable (a little pressure with pliers may help)
- when you enclose their Arduino + shield in the provided acrylic box, you can’t see the numbers on the shield RJ connectors anymore… small design flaw :-)
- the headless screws which keep the wheels in place are probably a little bit underdimensioned for the job; we had two times a wheel detaching from the shaft (or maybe they just weren’t tightened enough, not sure)
- in general, all those wires surrounding the robot look a bit clumsy (could be fixed with some cable binders, but then you have to rip them off everytime you want to build something new)
The programming part was also a breeze… or could have been. It was instead the most embarassing yet edifying, awkward yet successful part of the whole experience.
Let me explain: I connected the robot via USB to upload the code, installed the Makeblock Library, fired the Arduino IDE, configured the board as regular Arduino Uno and uploaded the sketch. Piece of cake.
Then we proceeded to actually test it. The IR seemed to work, at least several LEDs were blinking in response to keypresses. But… the motors didn’t do anything. Not a single movement. Dead. Bummer.
Well, I kept my cool and made several hypotheses: maybe the remote isn’t sending the correct codes, or maybe we wired up something wrong. So I took the code and (explaining to my son what I was doing) started adding several debug Serial.print statements. The IR codes were correct. The various Forward, Backward, TurnRight etc. functions were correctly called. Only the motors didn’t react.
After a few minutes, I realized what the problem was: the USB port only powers the Arduino, not the shield… and thus also not the motors. To have them working, you have to disconnect the USB and turn on the battery pack power, which connects to the shield. And indeed, the motors were happily turning!
Was really obvious, once you thought about it :-) Most importantly, however, my son was really enthralled by the whole debugging session. I think the incident helped him understand what programming is much, much more than a thousand “for dummy” books, or hours of theoretical introductions would have done. Bonus points for me and my stupidity, yay!
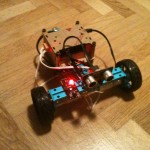
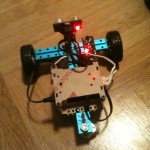
But back to our robot. Even in its simplest incarnation, just a glorified remote controlled vehicle with selectable speed, is big fun. You may, at this point, want to look at a couple of pictures, even if just to take a few seconds break from my prolixity :-)
The one depicted here is actually the second step: we added the ultrasonic “eyes” on the front and tried the second Makeblock example sketch (Ultrasonic car).
Shortly after, we decided to mashup both sketches to have the robot still remote controlled, but which turns left or right – as in, shy away – when it seees an object near. The result was very nice, as you can see in the mandatory amateurish video:
To summarize, it was all very cool. And I’m (actually, we both are) very happy with the Makeblock kit.
Sure, maybe the product is not 100% perfect, but this is actually good. Because you can feel that it has been designed by humans – and it took a lot of effort, for sure – and not by a huge multinational company that can throw inordinate amount of money at each problem (sorry LEGO, I’m not implying you are inhuman!).
Also, I would have really loved a little more “interconnectivity” out of the box. For example, to connect easily with LEGO bricks, you need longer plastic rivets, which are not included. Or to connect external electronics, all they really offer is a RJ11 breakout module (don’t know why they insist calling it RJ11, when it’s evidently RJ12), which is sold separately. But hey, they have to make a living too, so the vendor lock-in strategy is completely understandable.
I plan to return to my musical projects in the next future, but I will definitely be playing with robots again :-)
cheers,
Aldo


 Fritzing
 Makeblock
 narbotic
Comments are currently closed.