Day 1: In Which Our Hero Fights His Way To An Epic Victory
Hehee ok ok I know, there’s really nothing epic :-) But it feels like.
Yesterday I finally got my Amazon order delivered (ordered on 21st March. Shame on you Amazon seller! Shame on you DHL!) composed of:
- 50 led + resistors
- 50 condensators
- 50 trimmers
- 1 soldering kit for beginners
- 20 assorted, unspecified ICs. Yes, really. Showbag mode on :-)
Definitely enough to get me started! So I took the evening off, so to say, to get really hardcore with the Arduino.
First I had to setup the whole system on my home laptop, which is a pretty old IBM Thinkpad T60 running Windows XP. Everything went very smooth, just follow the instructions and you’re set.
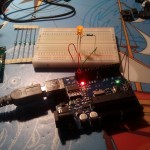
And soon I had my first breadboarded circuit :-) Nothing fancy, just the Blink example but with an external orange led:
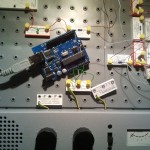
Then I did the AnalogReadSerial example, using the pot from the pompous Busch Electronic Experimental System 7000:
Let’s digress again to spend some words about this equipment… I bought it for my kid last year as a gentle introduction to electronics. Well, don’t do it :-) Thing is, the toy costs like 3 Arduinos, and it’s really not worth it. Furthermore, they use a kind of “simplified breadboard” concept, which means you snap LEGO-like blocks on a plate and connect them with wires using tiny plastic caps. Sounds easy, but it takes a lot of time and patience to build a circuit this way. Breadboarding is actually faster. My kid never really loved it, in fact. Still, I’m using it for the jumper wires and some components (it has a speaker, a pot, even a light sensor, which is definitely nice).
Anyway, I really was dancing for joy when I could get input from a knob. Endless possibilities opened to my mind :-) Then of course I couldn’t let the chance slip by to try the Tone and PitchFollower examples. Verrry nice! The PWM tone generation is of course kind of rude, in particular when modulating it with the pot. You can hear lots of distortion/aliasing/jaggies artifacts. I guess a DAC is really needed to make it sound better.
And finally, time for something really hard came.
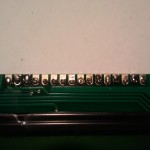
I summoned all my courage, turned on the solder pen, and started soldering the pin-strip to the LCD module. I studied some tutorials and videos beforehand, in particular I found useful this and this and this. Man, that was an experience! It took me 20 minutes and quite a lot of sweat. The result is, by all means, horrible. But hey, it works :-)
I think this picture can be used as the perfect example of how not to solder :-) I apparently did all kind of possible mistakes, despite all my best efforts.
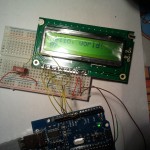
Imagine my despair and frustration when I breadboarded everything and wanted to run the Hello World example… and it didn’t work! I knew the LCD was alive, because setting the contrast worked. Just no characters were displayed. I checked and double-checked all the contact points a few times, but nothing. For 30 painful minutes I was very close to giving up. Then, I just decided to unwire everything and restart from scratch. I moved the LCD to a more comfortable position on the breadboard and rewired:
YAY! Don’t know really why it didn’t work first time, maybe the breadboard has some broken contacts. Or maybe I did something stupid. Or both. But it worked, and I almost had tears in my eyes :-)
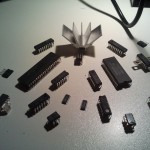
Before leaving, a funny picture of my IC sortiment:
Frankly, I can’t recommend it for Arduino tinkerers. Ok, for ~3€ is not a big tragedy; but almost all the chips are utterly useless. They look nice, however. I love the crowned one at the center (which happens to be a stepped motor driver, whatever this means). Useless, at least to me, but a real badass :-)
In brief, what I learned:
- Never never never give up! Arduino is sturdy, and so are the components (at least the ones I used so far). There is little that can go wrong. If something doesn’t work, just try again.
- Plan your buying carefully. Don’t buy useless stuff :-)
- Tinkering, soldering, breadboarding, etc. are all activities that require some exercise. But it’s not as difficult as it seems.
cheers,
Aldo


 Fritzing
 Makeblock
 narbotic
Comments are currently closed.